
If you’re like me, you have unfinished craft and sewing projects hiding in your closets. It’s easy to get side-tracked with new endeavors. I get it. But when you pull one of those discarded projects off the back burner and actually finish it, it is indeed satisfying. Recently, I did just that. I’ve had some bright orange fabric for drapes for my guest room tucked away in my sewing closet for over a year. The other day I moved the bolt of fabric a whole 4 feet, from the closet to my cutting table. And thus, the task began…
(This post may contain affiliate links; as an Amazon associate I earn from qualifying purchases. See disclosure here.)
supplies needed:
the plan
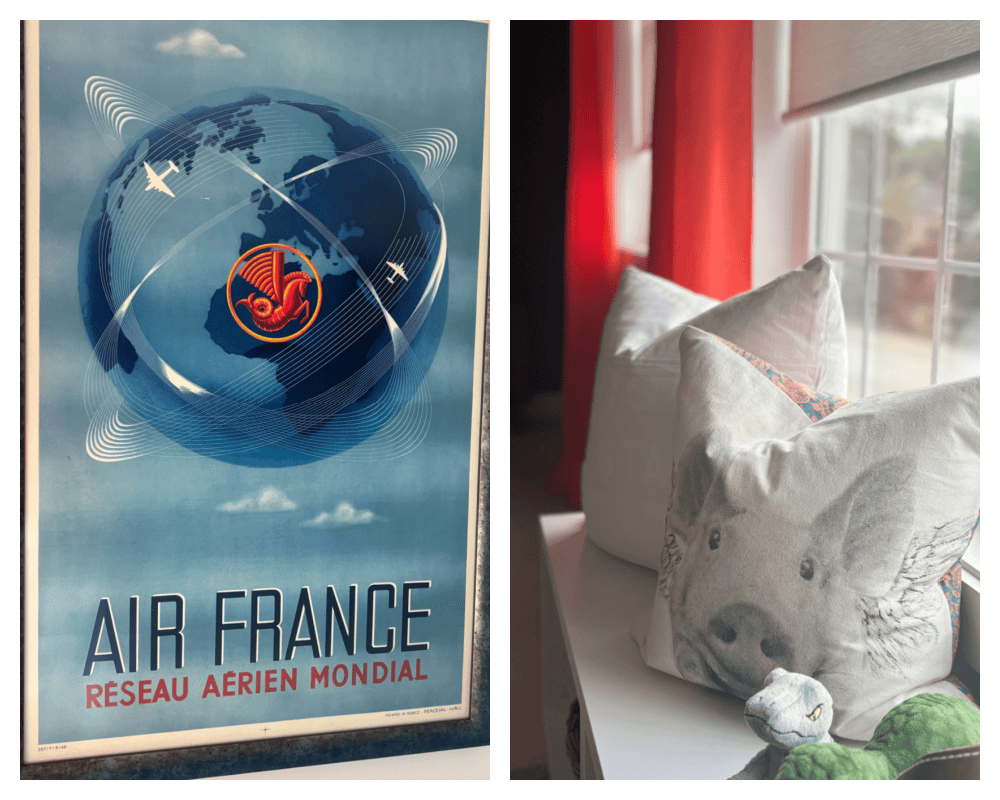
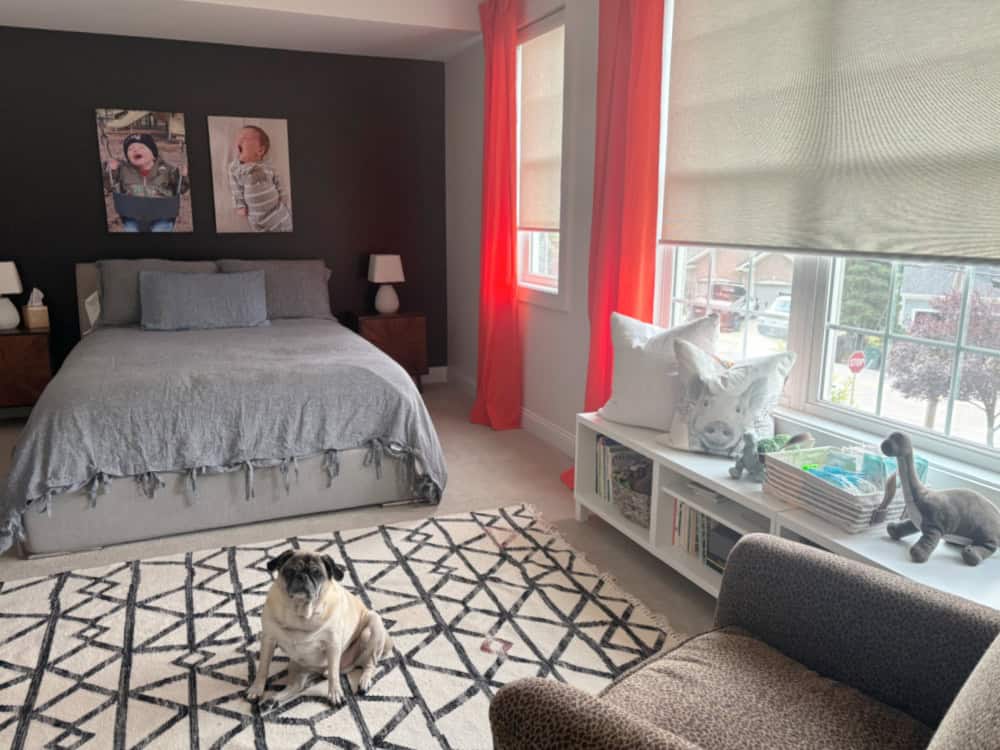
My guest room has a modern vibe with a few small boh0 touches. A comfy bed with a relaxed chambray linen comforter contrasts beautifully with the black accent wall behind it.

The rest of the walls are kept bright white; neutral blinds cover the windows. I liked that it was restful and inviting for guests, but I felt a pop color/cozy factor was missing. I decided to pick up the orange color from a vintage poster and a throw pillow to add some warmth.
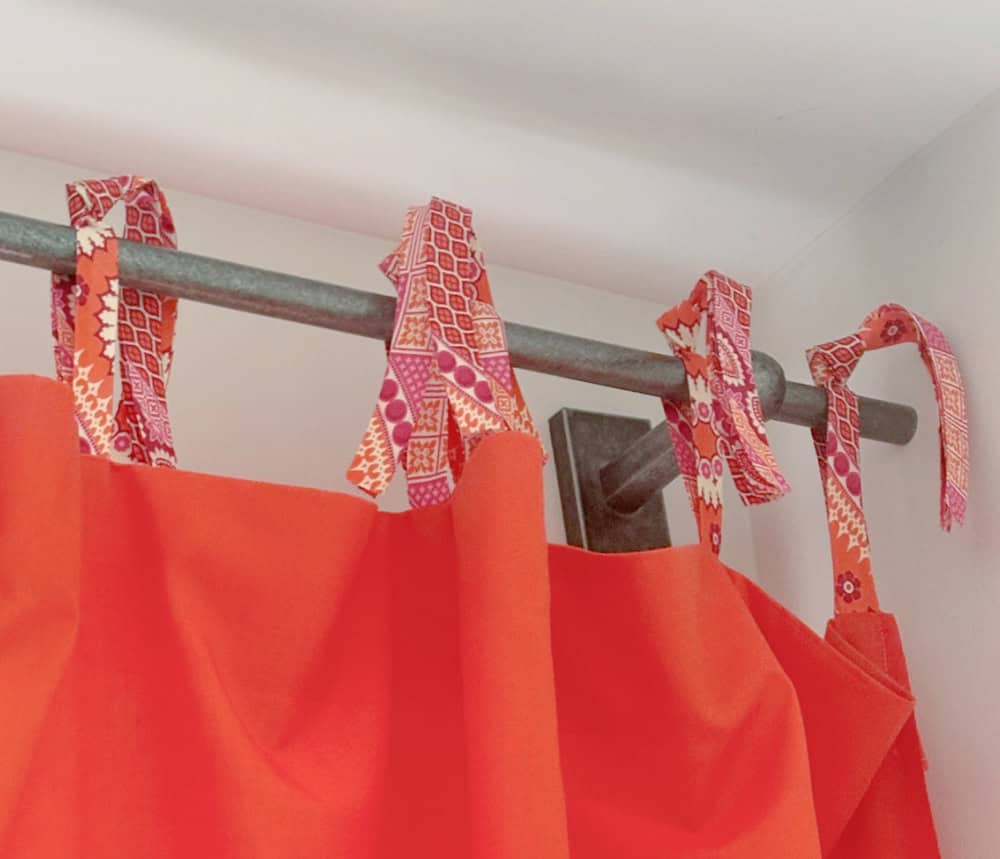
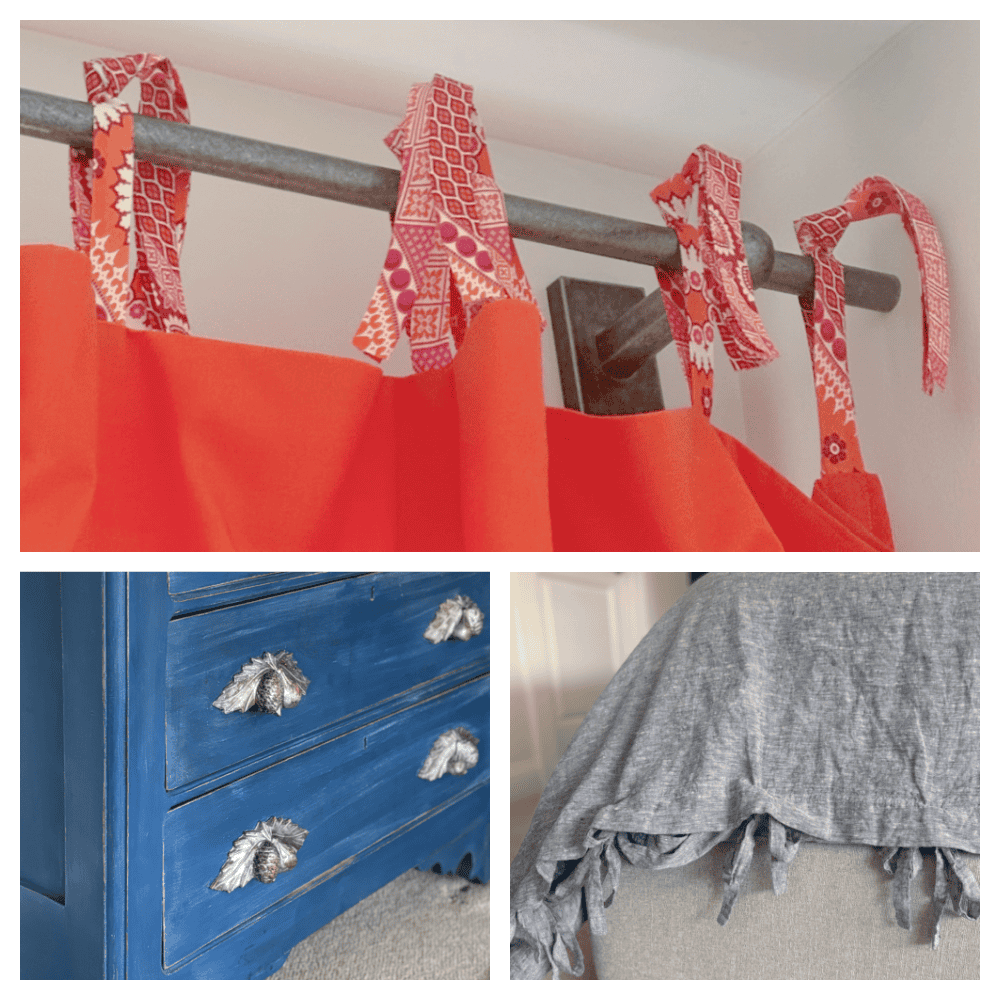
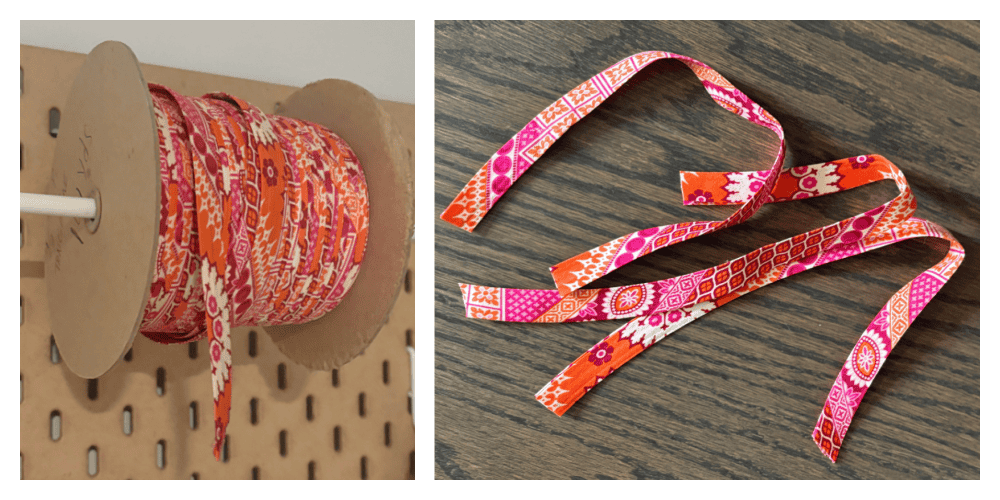
Then it happened. I found some beautiful, playful orange cotton fabric from Fabric Wholesale Direct. It was perfect for lightweight, unlined drapery panels with a flowing bohemian vibe, similar to styles I’ve eyed at Urban Outfitters. As an added detail, I decided to duplicate the loose ties on the linen comforter with tab ties for the drapes. The cast iron pewter rod and hardware (Pottery Barn) also compliment the silver paint on the antique dresser knobs.
cutting
*Keep in mind, I made these drapery panels to serve only as accents for my windows, not as functional drapes to pull close. They are meant to be left open. Functional drapes need to be at least as wide as the window itself; these decorative panels are only 45″.
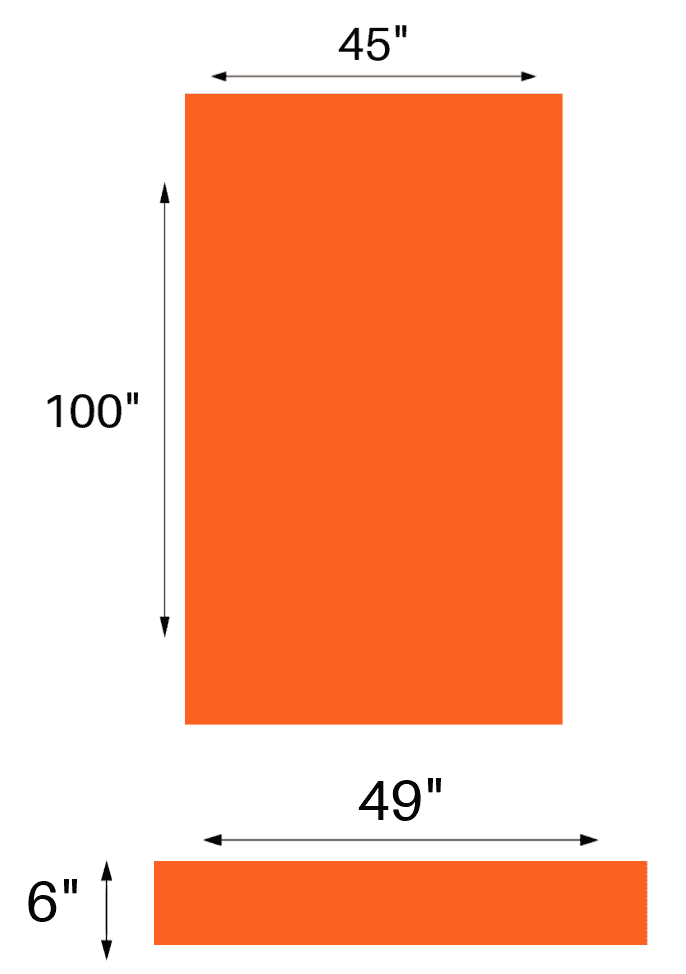
For each drapery panel, cut one piece for the body. Because my fabric was 45″ wide, I kept the width of my panels 45″. I cut the length 100″. You will need to determine the length you need, depending on your window size.
Also cut one facing per panel that measures 4″ wider than the drapery width and about 6″ long.
Finally, from the double-sided bias tape, cut 12 tabs that measure 12″ in length. (12 tabs are needed for each 45″ panel.)
sewing
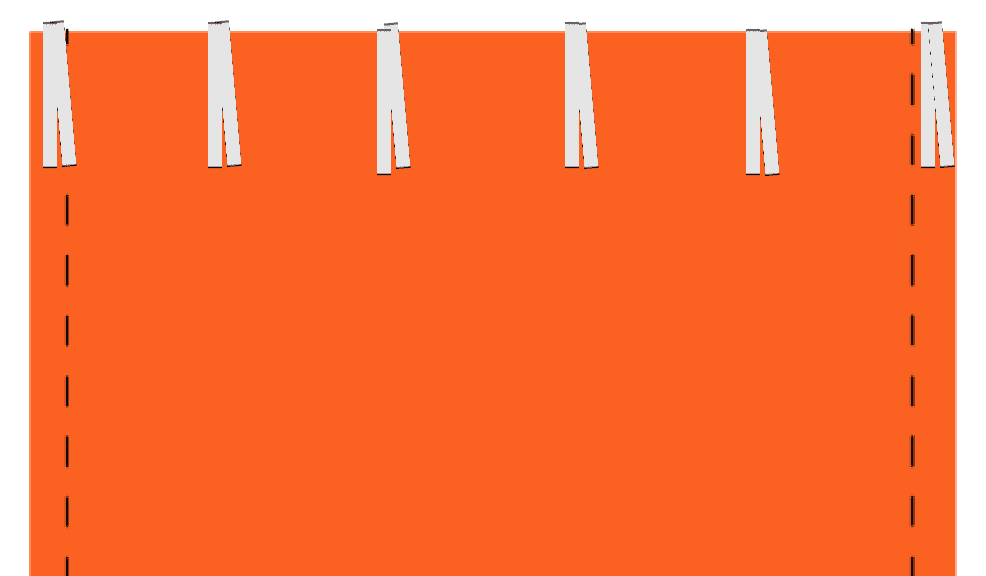
Stitch a narrow hem along the long sides of the drapery panel, leaving the bottom and top of the panel unfinished.

Place 6 tabs evenly spaced on right side & top of drapery panel, as shown below. (Use 2 pieces of bias tape for each tab.) Pin in place.
Next, place the facing to the top of the panel, right sides together, on top of the ties. Stitch in place.

Turn the side and bottom edges of the facing over and create a narrow hem. Stitch. Turn facing right side out; press.
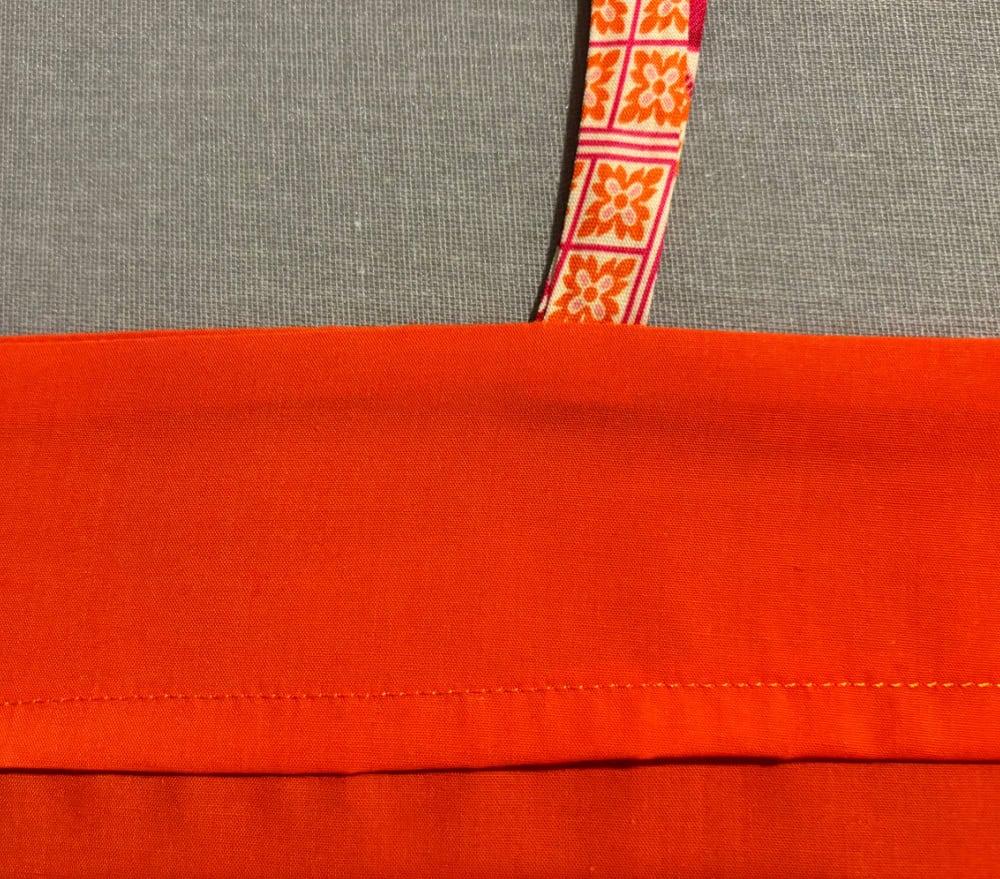
Hem the bottom of the panel with a narrow machine stitch. Press drape well before hanging. Note: for all you purists out there, you can hand stitch the facing down, but it’s really not necessary. This tutorial is for those seeking a quick & easy solution for simple unlined drapery panels. And just look how much oomph they add to a room!
the reveal
Sometimes heavy, lined drapes are needed for serious ambiance in a formal room. Other times, all that’s needed are simple, unlined, flowing curtains that bring a punch of color and whimsy. These bright free flowing drapery panels soften my guest room perfectly, creating a serene place for guests and a happy nook for grandbabies.

The biggest compliment is a little share – pin the photo below!
![]()

Thank you so much for your kind comments!
This is such a beautifully written and inspiring post! Your step-by-step guide on creating these unlined drapes is not only easy to follow but also brings so much warmth and character to a room. I love how you’ve thoughtfully chosen the vibrant orange fabric to add a playful yet cozy touch to your guest room. The way you’ve described the whole process makes it feel achievable even for someone new to sewing. Thank you for sharing this delightful project—it’s a perfect reminder of how a simple DIY can completely transform a space!