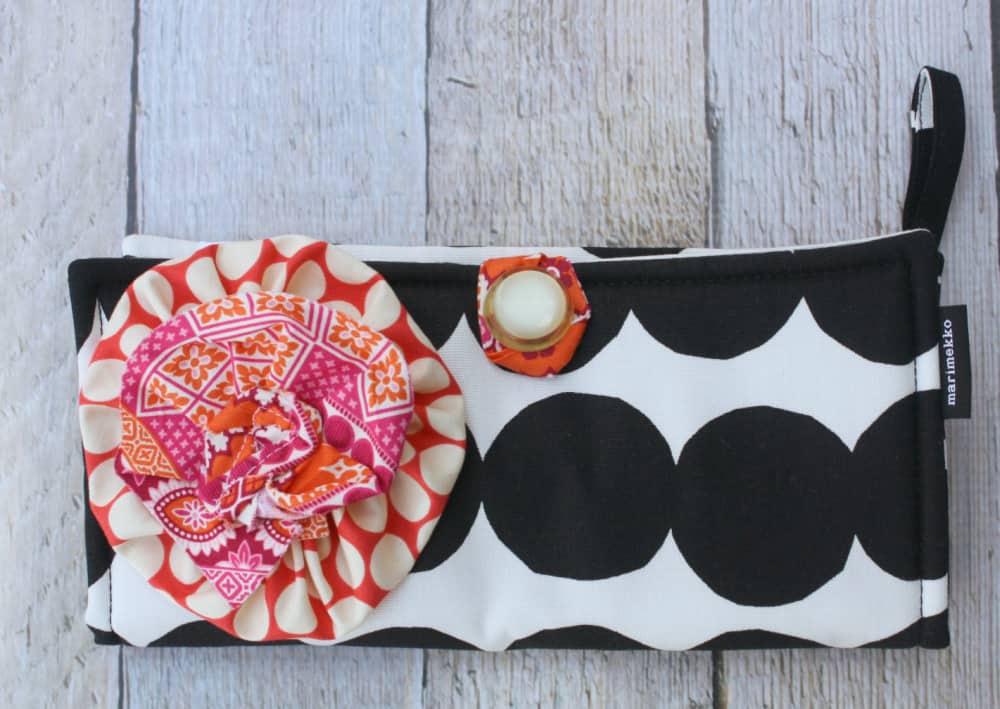
A few years ago, someone gave me a cute little organizer made from a potholder. Very cute, I thought. Then I tossed it into a drawer at my office. Wow, did I underestimate the value of that little gift! It was filled with all sorts of odd things – stamps, coins, rubber bands, ponytail holder, bobby pins… Not only did I use it frequently, but each time I grabbed the little pouch from my drawer I was in dire need of something – whether it was a bobby pin to hold back my bangs or coins for the vending machine. That DIY emergency clutch wasn’t just cute – it was a lifesaver!
I used this emergency pouch so much that I decided to copy my friend’s ingenuity and make a few as Christmas gifts. I knew I wanted a whimsical look, so the first thing I did was order several Marimekko potholders from Finnish Design shop.
(Affiliate links included for your convenience. As an Amazon associate I earn from qualifying purchases. See disclosure here.)
supplies needed:
- potholder
- needle & thread
- Ziplock snack bags
- double fold bias tape
- fabric scraps
- vintage button
step 1 – attach loop

Cut a 4 1/2″ strip of double folded bias tape, then attach it to the top inside of the potholder, stitching it in place. This forms a loop for a button. If you want to add some whimsy, check out this bias tape in pretty shades and patterns.
step 2 – attach button
Stitch button to the outside of the potholder. I found a beautiful little vintage one I used.
step 3 – make and attach yo-yo flower
To make this flower, all you need is a scrap of fabric. Follow this tutorial on how to make a yo-yo fabric flower. Then stitch the flower in place with a needle and thread.

step 4 – make and attach boho flower
With a contrasting scrap of fabric, make this raw-edge fabric flower and stitch it to the center of the first flower. See how to make this boho flower here.

step 5 – attach Ziplock bags
Take about 5 Ziplock snack bags and place them on top of each other. Using a needle and thread, make a secure stitch through the bottom center of the pile. Then stitch it to the inside center of the potholder.


step 6 – fill with supplies
This is the fun part of making this DIY emergency clutch. Fill it with supplies for lots of unexpected emergencies.
- one dollar bill
- loose coins (a penny, a nickel, a dime, a quarter)
- several Q-tips
- bandaid
- several bobby pins & a pony-tail holder
- postage stamp
- paperclip
- safety pin
- toothpicks
- nail file
- Advil
Thanks to my sweet friend Robin for that little gift years ago. Now I’m spreading the love.
The biggest compliment is a little share – pin the photo below!


Such a great idea, I have a friend’s birthday coming up and no ideas for her. This could be just right, thanks
Glad you liked it, Julie!
I love Marimekko’s graphic style. This is great and serves so many purposes plus it’s my favorite combo of pretty and practical. Featuring when my link party opens!
Thanks!
What a great idea, and you took it and ran with it in a big way, Wendy!
Thanks!
Hi Wendy, Thank you for sharing your links with us at #273 SSPS Linky. See you again next week.
That’s cute! What a great idea!!! I really need to get back into my sewing and craft room. 🙂
Super fun idea! I need something like this to keep my purse from the explosion it often becomes. Visiting from Waste Not Wednesday party.
Thanks so much for stopping by!
These are adorable. I love the patterns you choose.
Thank you for sharing this with us on the #HomeMattersParty. We hope to see you next Friday at 12 AM EST when we open our doors again.
What an awesome idea, I love it ! As you know I am also a huge Marimekko fan, pinning this to my Marimekko crafts board. Great tutorial too Wendy.
Thanks Claire!