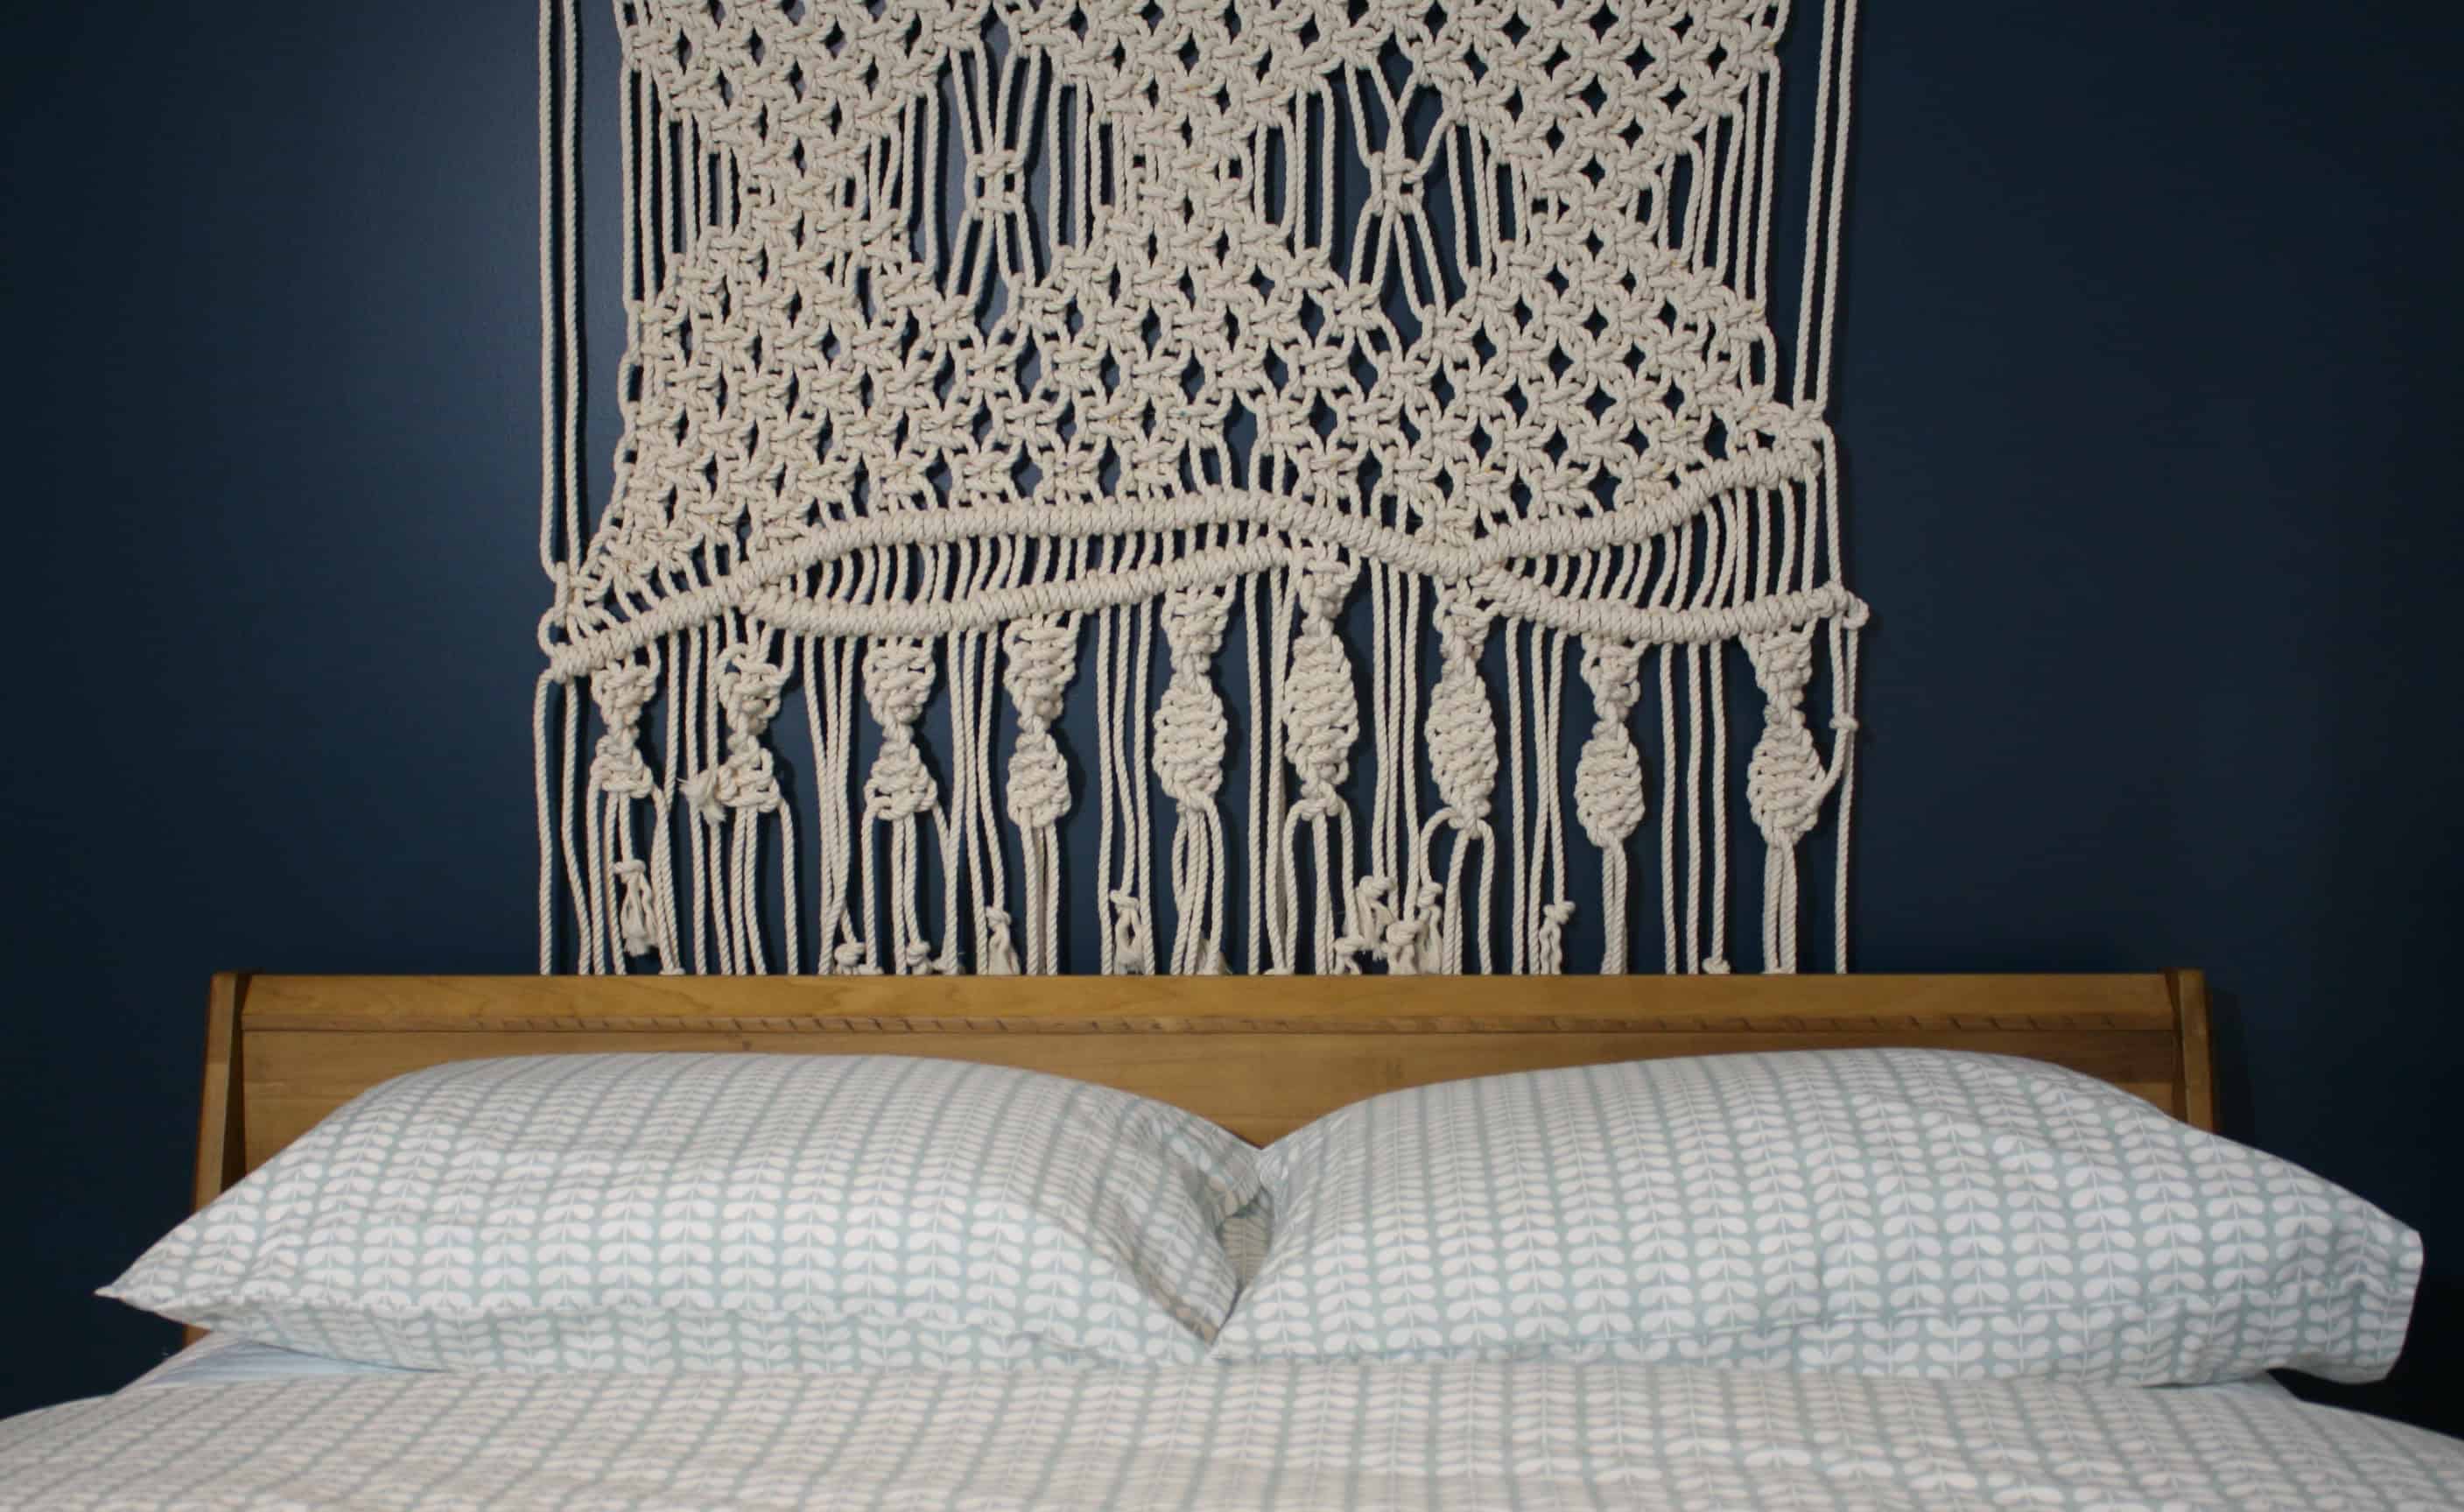
As we enter our fourth week of this One Room Challenge, I’ve decided to work on the focal point of my guest/sewing room. As you know, every well designed room needs an effective focal point. Mantles, fireplaces, bay windows all come to mind. But for this project, my main point of interest embodies all that I want this room to say (boho, artsy, girly) – a large macrame wall hanging. And yes, I made it myself. With a broom handle and 960 feet of rope.
I’ve always harbored a bit of Bohemia in my soul, so I was happier than most when macrame made its recent comeback. I knew when I began envisioning this room that I wanted a dark accent wall with a larger-than-life macrame tapestry hanging over the bed. I actually made this macrame wall hanging months ago, knowing I would find it a proper home eventually. And this is the perfect place!
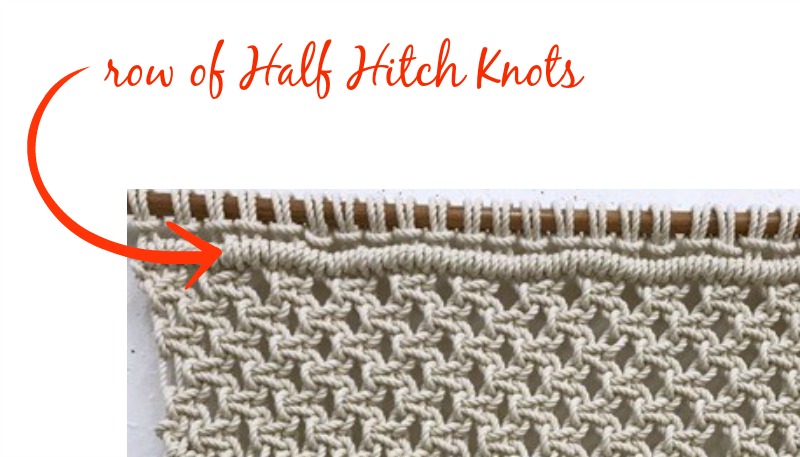
In case you want to try your hand at macrame, I’m happy to share the process with you. Keep in mind that this project is not for beginners. It requires a comfort level with the Half Hitch Knot. (I have more macrame tutorials on my blog that are perfect for novices.)
(Affiliate links included for your convenience. As an Amazon associate I earn from qualifying purchases. See disclosure here.)
getting started
The first step? Order rope. Lots of it. 960 feet, to be exact. (I used a 3 strand cotton rope, approximately 3/8 – 1/2″ diameter.)
- Cut the broom handle to about 52″ long (I found this to be stronger than using a dowel rod.)
- Cut 32 pieces of rope, each measuring approximately 30 feet.
- Tie the 32 pieces onto the pole using Lark’s Head Knots.
macrame wall hanging instructions
*Throughout these instructions, SK = Square Knot, and “skip 4” = skip 4 cords, “skip 2 = skip 2 cords, etc.
- row 1: Using a Half Hitch Knot, make a horizontal row just beneath the Lark’s Head Knots.
- row 2: Starting with the first cord on the left, make 16 Square Knots
- row 3: Starting with the third cord on left, make 15 Square Knots. Leave the last 2 cords hanging.
- row 4: Repeat row 2
- row 5:Repeat row 3
- row 6: Repeat row 2
- row 7: Repeat row 3
- row 8: Starting with 5th cord on left, make 8 Square Knots – skip 4 cords – make 2 Square Knots – skip 8 cords – 2 Square Knots
- row 9: Starting with 7th cord on left, make 3 SK – skip 24 cords – 1 SK – skip 12 cords – 1 SK – skip last 2 cords
- row 10: Starting with the 11th cord on left, make 1 Square Knot – skip the rest of the cords until you get to the last 6 cords – then make 1 Square Knot – skip last 2 cords
- row 11: Using the Half Hitch Knot, make a curving free-flowing line across the full width of the tapestry.
- Begin row 12 a few inches down from the previous row. Make another full wave of Half Hitch Knots.
- Begin row 13 about 8 inches down from the left side of previous row, and make a short wave of Half Hitch Knots as shown below, which meets the wavy line above.
- Skip down a bit more space & begin row 14, which is another full line of Half Hitch Knots. Try to keep this row relatively horizontal.
- row 15: Repeat row 3
- row 16: Starting with the 5th cord on left, make 14 Square Knots, leaving the last 4 cords hanging.
- row 17: Repeat row 3
- row 18: Starting with 5th cord on left, make 4 Square Knots – skip 4 cords – 4 Square Knots – skip 4 – 4 Square Knots – leave 4 cords hanging.
- row 19: Starting with 7th cord on left, make 3 Square Knots – skip 8 cords – 3 Square Knots – skip 8 – 3 Square Knots – leave 6 cords hanging.
- row 20: Starting with 9th cord on left, make 2 SK – skip 4 cords – 1 SK – skip 4 – 2 SK – skip 4 – 1 SK – skip 4 – 2 SK – leave 8 cords hanging.
- row 21: Starting with 11th cord on left, make 1 SK – skip 16 cords – 1 SK – skip 16 – 1 SK – leave 10 cords hanging.
- row 22: Starting with 9th cord on left, make 2 SK – skip 12 cords – 2 SK – skip 12 – 2 SK – leave 8 cords hanging.
- row 23: Repeat row 19
- row 24: Repeat row 18
- row 25: Repeat row 3
- row 26: Starting with 5th cord on left, make 14 Square Knots, then leave 4 cords hanging.
- row 27: Starting with the 3rd cord on left, make 15 Square Knots, then leave the last 2 cords hanging.
- row 28: Starting with 5th cord on left, make 7 SK – skip 4 cords – 5 SK – then leave the remaining cords hanging.
- row 29: Starting with 3rd cord on left, make 3 Square Knots – skip 28 cords – 1 Square Knot – then leave the rest hanging.
- row 30: Starting with 5th cord on left, make 1 SK – skip 34 cords – 1 SK – leave the rest hanging.
- row 31: Starting with 3rd cord on left, make 1 SK – leave the rest hanging.
- row 32: Starting with 1st cord on left, make 1 Square Knot, then leave the rest hanging. (You have now completed the middle section.)
- Now make another row or two of Half Hitch Knots, as shown in the photo below.
- To finish the bottom of the wall hanging, starting with the 3rd cord from left, use the next 4 cords to make the first half of a Square Knot. Then complete the knot, always starting from the same side. This will make the knot twist. Keep making a vertical row of knots in this fashion until they are about 6 inches long. Skip the next 3 cords and make another vertical strand of knots that twist. Continue this pattern.
- Finish the bottom by tying random knots and untwisting the ends so they will fray.
Now that you’ve seen what I have in the works, check out some other One Room Challenge participants!
The biggest compliment is a little share… please pin the image below!
Need to save this for later?


Loving the macrame work.. I’ll be watching, good luck.
Thanks Suzanne!